Malanleitungen / Warhammer 40,000 / Dark Angels / Intercessor Squad
Intercessor Squad bemalen
Referenzfotos, Farbschemata mit den genauen Farben für jeden Bereich und fertige Modelle anderer Maler — alles, was du brauchst, um Intercessor Squad für deine Dark Angels zu beginnen.
Rolle BattlelinePunkte 80Fraktion Dark AngelsSystem Warhammer 40,000
InfantryGrenadesImperiumTacticusIntercessor Squad
Jede Farbe unten verlinkt auf ihre Entsprechungen in anderen Marken.
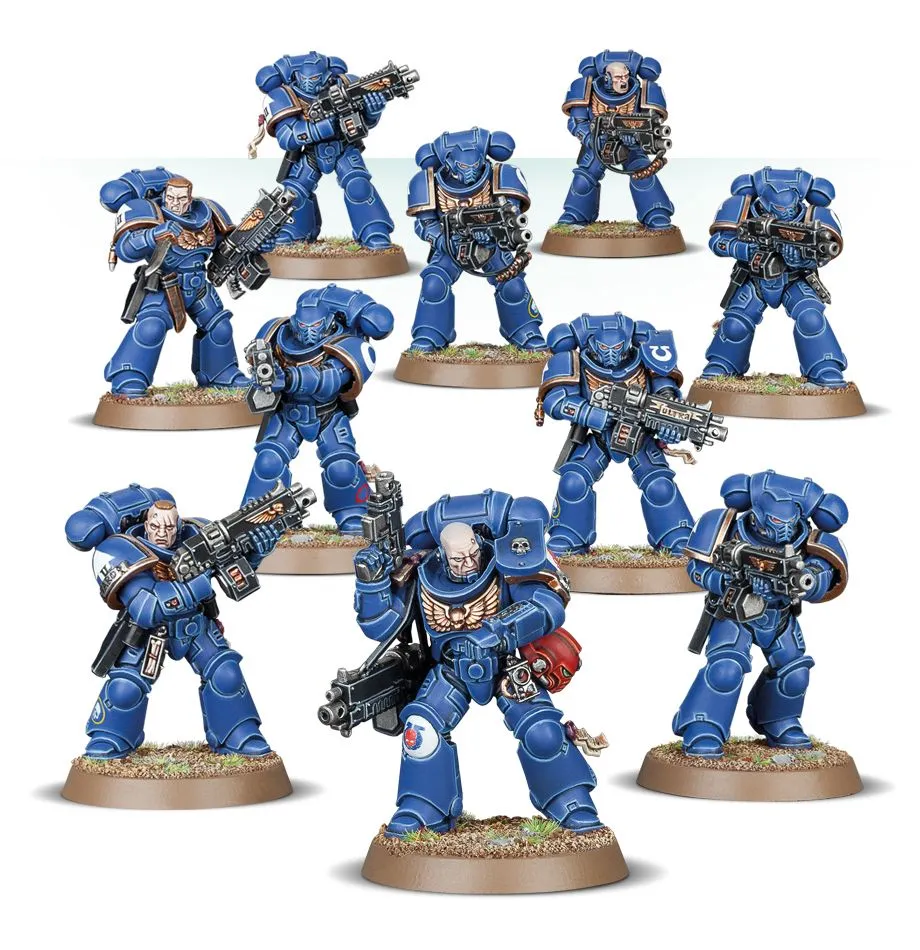
So sieht Intercessor Squad aus
Farbschemata
Dark Angels — Intercessor Squad
The squad most painters start with, and the one that sets the standard for everything after it. Batch-paint the five as one model. Painted in Dark Angels colours, from primer to based.
Power armour
- Caliban Green Citadel
- Nuln Oil Citadel
- Warpstone Glow Citadel
- Basecoat the armour plates Basecoat — Two thin coats, leaving the recesses slightly darker. Thin with water until the paint flows off the brush rather than sits on it.
- Shade the recesses Recess shade — Run the shade into panel lines and around raised details only. A full wash over the plates flattens the armour.
- Edge highlight the plates Edge highlight — A fine line along the top edge of each plate, where light would land. Stop before the line meets the next edge.
Bolter and metal
- Leadbelcher Citadel
- Nuln Oil Citadel
- Ironbreaker Citadel
- Balthasar Gold Citadel
- Basecoat the metal Basecoat — Leadbelcher over the bolter body, barrel and any exposed pistons.
- Shade the metal All-over shade — Nuln Oil across the whole weapon — metallics are the one area that wants a full wash.
- Bring back the edges Edge highlight — Ironbreaker on the barrel rim and casing edges, then a spot of bronze on the ammo feed.
Shoulder trim and bronze
- Balthasar Gold Citadel
- Agrax Earthshade Citadel
- Sycorax Bronze Citadel
- Basecoat the trim Basecoat — Keep the line clean — trim is what the eye follows, so a wobble here is more visible than one anywhere else.
- Shade the trim Recess shade — Agrax Earthshade where the trim meets the plate, so it reads as a separate piece of metal.
- Highlight the trim Edge highlight
Helmet lenses
- Mephiston Red Citadel
- Evil Sunz Scarlet Citadel
- Wild Rider Red Citadel
- White Scar Citadel
- Fill the lens Basecoat — Fill the whole lens recess with the darkest red.
- Leave a dark rim Layer — Cover the lens again but stop short of the bottom edge, leaving a crescent of the base colour.
- Dot the catchlight Detail — One small dot in the upper corner. The dot is what makes the lens read as glass.
Bone robes and tabards
- Ushabti Bone Citadel
- Seraphim Sepia Citadel
- Screaming Skull Citadel
- Basecoat the robes Basecoat — Ushabti Bone over a grey primer covers in two coats; over black it will take four.
- Shade the folds All-over shade — Seraphim Sepia across the whole robe — cloth is one of the few areas that wants a full shade, not a pin-wash.
- Highlight the raised folds Drybrush — A light drybrush of Screaming Skull picks out the fold ridges without redrawing them.
Base
- Astrogranite Citadel
- Administratum Grey Citadel
- Dawnstone Citadel
- Abaddon Black Citadel
- Texture the base Texture — Astrogranite straight from the pot with an old brush, kept off the rim.
- Drybrush the rubble Drybrush — Administratum Grey, then a lighter pass so only the highest grit catches it.
- Paint the rim Detail — Abaddon Black around the rim in one steady pass. A clean rim is what makes a squad look finished.
Alle Farben auf dieser Seite
19 Farben über alle Farbschemata und Tutorials oben. Hake ab, was du brauchst, um eine Liste aufzubauen, oder folge einer Farbe, um sie in einer anderen Marke zu finden.
- Abaddon Black Citadel
- Administratum Grey Citadel
- Agrax Earthshade Citadel
- Astrogranite Citadel
- Balthasar Gold Citadel
- Caliban Green Citadel
- Dawnstone Citadel
- Evil Sunz Scarlet Citadel
- Ironbreaker Citadel
- Leadbelcher Citadel
- Mephiston Red Citadel
- Nuln Oil Citadel
- Screaming Skull Citadel
- Seraphim Sepia Citadel
- Sycorax Bronze Citadel
- Ushabti Bone Citadel
- Warpstone Glow Citadel
- White Scar Citadel
- Wild Rider Red Citadel
Mehr Malanleitungen für Dark Angels →
Begleite dieses Projekt vom Spritzling bis fertig
Lege Intercessor Squad auf deinen Stapel, hake die Farben ab, die du schon hast, und sieh, was noch fehlt, bevor du die Box öffnest.