Painting guides / Warhammer 40,000 / Space Wolves / Intercessor Squad
How to paint Intercessor Squad
Reference photos, colour schemes with the exact paints for every area, and finished models from other painters — everything you need to start Intercessor Squad for your Space Wolves force.
Role BattlelinePoints 80Faction Space WolvesSystem Warhammer 40,000
InfantryGrenadesImperiumTacticusIntercessor Squad
Every paint below links to its equivalents in other brands.
What Intercessor Squad looks like
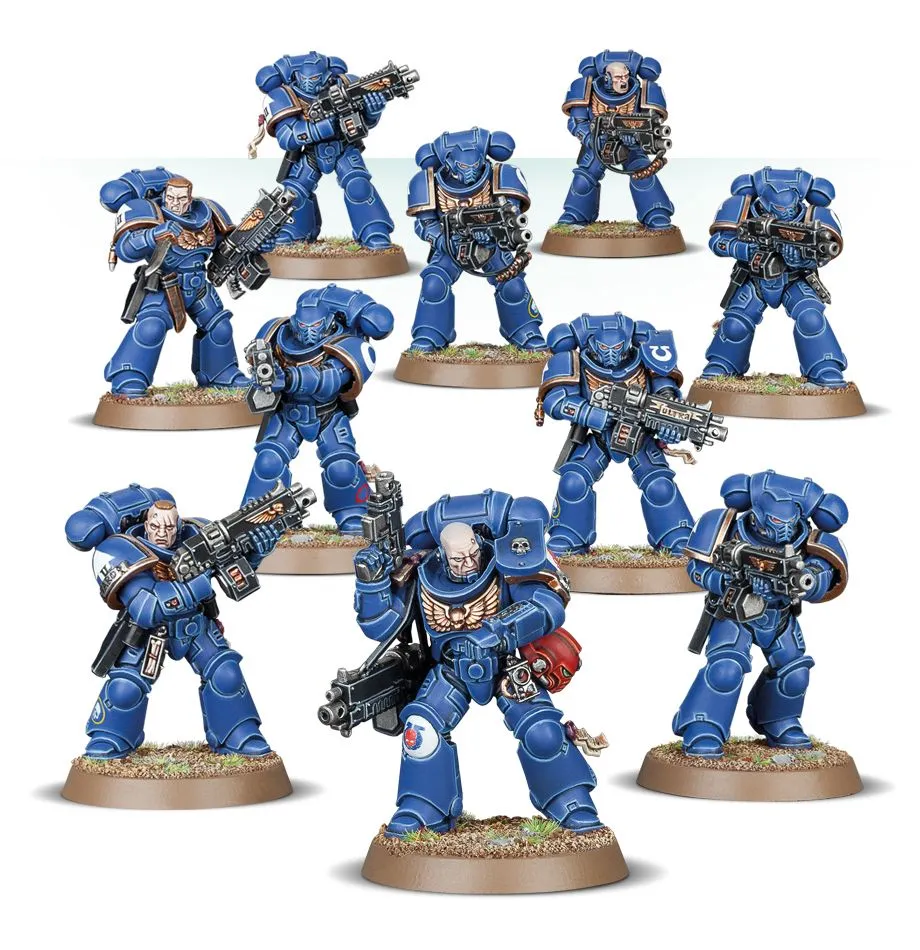
Colour schemes
Space Wolves — Intercessor Squad
The squad most painters start with, and the one that sets the standard for everything after it. Batch-paint the five as one model. Painted in Space Wolves colours, from primer to based.
Power armour
- The Fang Citadel
- Drakenhof Nightshade Citadel
- Fenrisian Grey Citadel
- Russ Grey Citadel
- Basecoat the armour plates Basecoat — Two thin coats, leaving the recesses slightly darker. Thin with water until the paint flows off the brush rather than sits on it.
- Shade the recesses Recess shade — Run the shade into panel lines and around raised details only. A full wash over the plates flattens the armour.
- Edge highlight the plates Edge highlight — A fine line along the top edge of each plate, where light would land. Stop before the line meets the next edge.
- Sharpen the brightest edges Edge highlight — Only the corners and the very top of each plate — this is a fraction of the previous line.
Bolter and metal
- Leadbelcher Citadel
- Nuln Oil Citadel
- Ironbreaker Citadel
- Basecoat the metal Basecoat — Leadbelcher over the bolter body, barrel and any exposed pistons.
- Shade the metal All-over shade — Nuln Oil across the whole weapon — metallics are the one area that wants a full wash.
- Bring back the edges Edge highlight — Ironbreaker on the barrel rim and casing edges, then a spot of steel on the ammo feed.
Shoulder trim and steel
- Leadbelcher Citadel
- Nuln Oil Citadel
- Ironbreaker Citadel
- Basecoat the trim Basecoat — Keep the line clean — trim is what the eye follows, so a wobble here is more visible than one anywhere else.
- Shade the trim Recess shade — Agrax Earthshade where the trim meets the plate, so it reads as a separate piece of metal.
- Highlight the trim Edge highlight
Helmet lenses
- Mephiston Red Citadel
- Evil Sunz Scarlet Citadel
- Wild Rider Red Citadel
- White Scar Citadel
- Fill the lens Basecoat — Fill the whole lens recess with the darkest red.
- Leave a dark rim Layer — Cover the lens again but stop short of the bottom edge, leaving a crescent of the base colour.
- Dot the catchlight Detail — One small dot in the upper corner. The dot is what makes the lens read as glass.
Pelts, leather and totems
- Mournfang Brown Citadel
- Agrax Earthshade Citadel
- Karak Stone Citadel
- Ushabti Bone Citadel
- Basecoat the pelts Basecoat — Mournfang Brown for leather straps and wolf pelts; keep it off the armour plates.
- Shade into the fur All-over shade — Agrax Earthshade over the whole pelt — fur has no clean recesses to pin-wash.
- Drybrush the fur and pick out the teeth Drybrush — Karak Stone across the fur, then Ushabti Bone on teeth, claws and bone totems.
Base
- Astrogranite Citadel
- Administratum Grey Citadel
- Dawnstone Citadel
- Abaddon Black Citadel
- Texture the base Texture — Astrogranite straight from the pot with an old brush, kept off the rim.
- Drybrush the rubble Drybrush — Administratum Grey, then a lighter pass so only the highest grit catches it.
- Paint the rim Detail — Abaddon Black around the rim in one steady pass. A clean rim is what makes a squad look finished.
Every paint on this page
19 paints across every scheme and tutorial above. Tick what you need to build a list, or follow a paint through to find it in another brand.
- Abaddon Black Citadel
- Administratum Grey Citadel
- Agrax Earthshade Citadel
- Astrogranite Citadel
- Dawnstone Citadel
- Drakenhof Nightshade Citadel
- Evil Sunz Scarlet Citadel
- Fenrisian Grey Citadel
- Ironbreaker Citadel
- Karak Stone Citadel
- Leadbelcher Citadel
- Mephiston Red Citadel
- Mournfang Brown Citadel
- Nuln Oil Citadel
- Russ Grey Citadel
- The Fang Citadel
- Ushabti Bone Citadel
- White Scar Citadel
- Wild Rider Red Citadel
More Space Wolves painting guides →
Track this project from sprue to finished
Add Intercessor Squad to your pile, tick off the paints you already own, and see what is still missing before you open the box.