Guías de pintado / Warhammer 40,000 / Imperial Fists / Intercessor Squad
Cómo pintar Intercessor Squad
Fotos de referencia, esquemas de color con las pinturas exactas de cada zona y miniaturas acabadas de otros pintores — todo lo que necesitas para empezar Intercessor Squad para tu fuerza de Imperial Fists.
Rol BattlelinePuntos 80Facción Imperial FistsSistema Warhammer 40,000
InfantryGrenadesImperiumTacticusIntercessor Squad
Cada pintura de abajo enlaza con sus equivalentes en otras marcas.
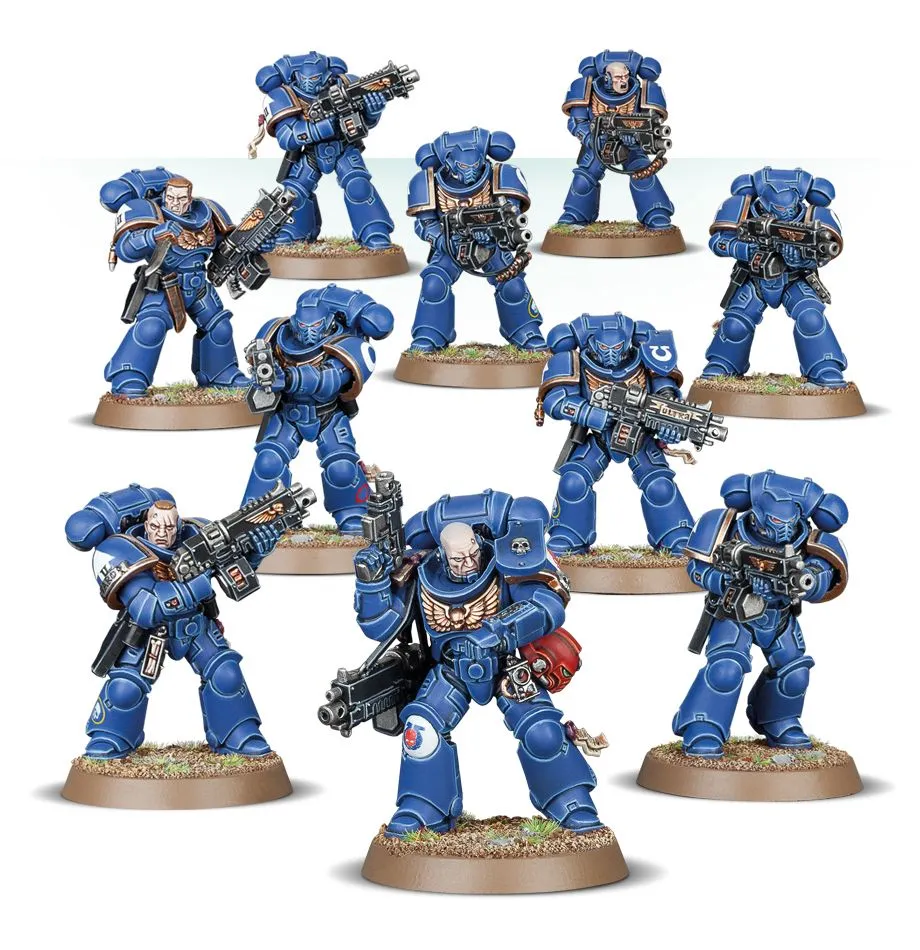
Qué aspecto tiene Intercessor Squad
Esquemas de color
Imperial Fists — Intercessor Squad
The squad most painters start with, and the one that sets the standard for everything after it. Batch-paint the five as one model. Painted in Imperial Fists colours, from primer to based.
Power armour
- Wraithbone Citadel
- Averland Sunset Citadel
- Casandora Yellow Citadel
- Dorn Yellow Citadel
- Flash Gitz Yellow Citadel
- Undercoat light Primer — Yellow has almost no covering power over black. Starting from a bone primer is the difference between two coats and six.
- Basecoat the armour plates Basecoat — Two thin coats, leaving the recesses slightly darker. Thin with water until the paint flows off the brush rather than sits on it.
- Shade the recesses Recess shade — Run the shade into panel lines and around raised details only. A full wash over the plates flattens the armour.
- Edge highlight the plates Edge highlight — A fine line along the top edge of each plate, where light would land. Stop before the line meets the next edge.
- Sharpen the brightest edges Edge highlight — Only the corners and the very top of each plate — this is a fraction of the previous line.
Bolter and metal
- Leadbelcher Citadel
- Nuln Oil Citadel
- Ironbreaker Citadel
- Basecoat the metal Basecoat — Leadbelcher over the bolter body, barrel and any exposed pistons.
- Shade the metal All-over shade — Nuln Oil across the whole weapon — metallics are the one area that wants a full wash.
- Bring back the edges Edge highlight — Ironbreaker on the barrel rim and casing edges, then a spot of steel on the ammo feed.
Shoulder trim and steel
- Leadbelcher Citadel
- Nuln Oil Citadel
- Ironbreaker Citadel
- Basecoat the trim Basecoat — Keep the line clean — trim is what the eye follows, so a wobble here is more visible than one anywhere else.
- Shade the trim Recess shade — Agrax Earthshade where the trim meets the plate, so it reads as a separate piece of metal.
- Highlight the trim Edge highlight
Helmet lenses
- Caliban Green Citadel
- Warpstone Glow Citadel
- Moot Green Citadel
- White Scar Citadel
- Fill the lens Basecoat — Fill the whole lens recess with the darkest green.
- Leave a dark rim Layer — Cover the lens again but stop short of the bottom edge, leaving a crescent of the base colour.
- Dot the catchlight Detail — One small dot in the upper corner. The dot is what makes the lens read as glass.
Black plates and chapter badge
- Abaddon Black Citadel
- Eshin Grey Citadel
- Mephiston Red Citadel
- Flash Gitz Yellow Citadel
- Basecoat the black plates Basecoat — Imperial Fists break up the yellow with black knee and shoulder plates — paint these before the final yellow highlight so overspill is easy to fix.
- Edge the black Edge highlight — A single Eshin Grey line; anything brighter fights the yellow for attention.
- Paint the fist Layer — Mephiston Red field with a Flash Gitz Yellow fist, or a transfer over gloss varnish.
Base
- Astrogranite Citadel
- Administratum Grey Citadel
- Dawnstone Citadel
- Abaddon Black Citadel
- Texture the base Texture — Astrogranite straight from the pot with an old brush, kept off the rim.
- Drybrush the rubble Drybrush — Administratum Grey, then a lighter pass so only the highest grit catches it.
- Paint the rim Detail — Abaddon Black around the rim in one steady pass. A clean rim is what makes a squad look finished.
Todas las pinturas de esta página
18 pinturas entre todos los esquemas y tutoriales de arriba. Marca lo que necesites para armar una lista, o sigue una pintura para encontrarla en otra marca.
- Abaddon Black Citadel
- Administratum Grey Citadel
- Astrogranite Citadel
- Averland Sunset Citadel
- Caliban Green Citadel
- Casandora Yellow Citadel
- Dawnstone Citadel
- Dorn Yellow Citadel
- Eshin Grey Citadel
- Flash Gitz Yellow Citadel
- Ironbreaker Citadel
- Leadbelcher Citadel
- Mephiston Red Citadel
- Moot Green Citadel
- Nuln Oil Citadel
- Warpstone Glow Citadel
- White Scar Citadel
- Wraithbone Citadel
Más guías de pintado de Imperial Fists →
Sigue este proyecto desde la bancada hasta el final
Añade Intercessor Squad a tu pila, marca las pinturas que ya tienes y comprueba qué falta antes de abrir la caja.